Station Upload (S7-300/S7-400)
Note
The upload variant Station upload is only available from TIA Portal V15.1 onwards. It is the recommended method.
Note
If you want to perform a Station upload with a NAT router, see
Requirements for carrying out a station upload.
In the case of Station upload, the backup is created with TIA Openness. A detailed comparison and a restore of the backup can be performed. Current values are saved, and also compared, depending on the configuration.
Note
If TIA Portal V17 and firmware V2.9 with encrypted communication are used on this controller, this method is automatically selected. However, it is also possible to use the legacy method. This can be set in the job configuration.
Note
For the comparison strategy, we recommend that you select the value Prev. Backup`<> Backup. This is because there
will always be differences when comparing Server version <>`Backup.
Note
Station upload supports password protected projects, NAT routing and CPU passwords.
Image: Job configuration, section TIA Portal settings, upload variant station upload
- Click on the Projectdropdown list and select the project.
- Click on the Devices dropdown list and select the CPU of the project.
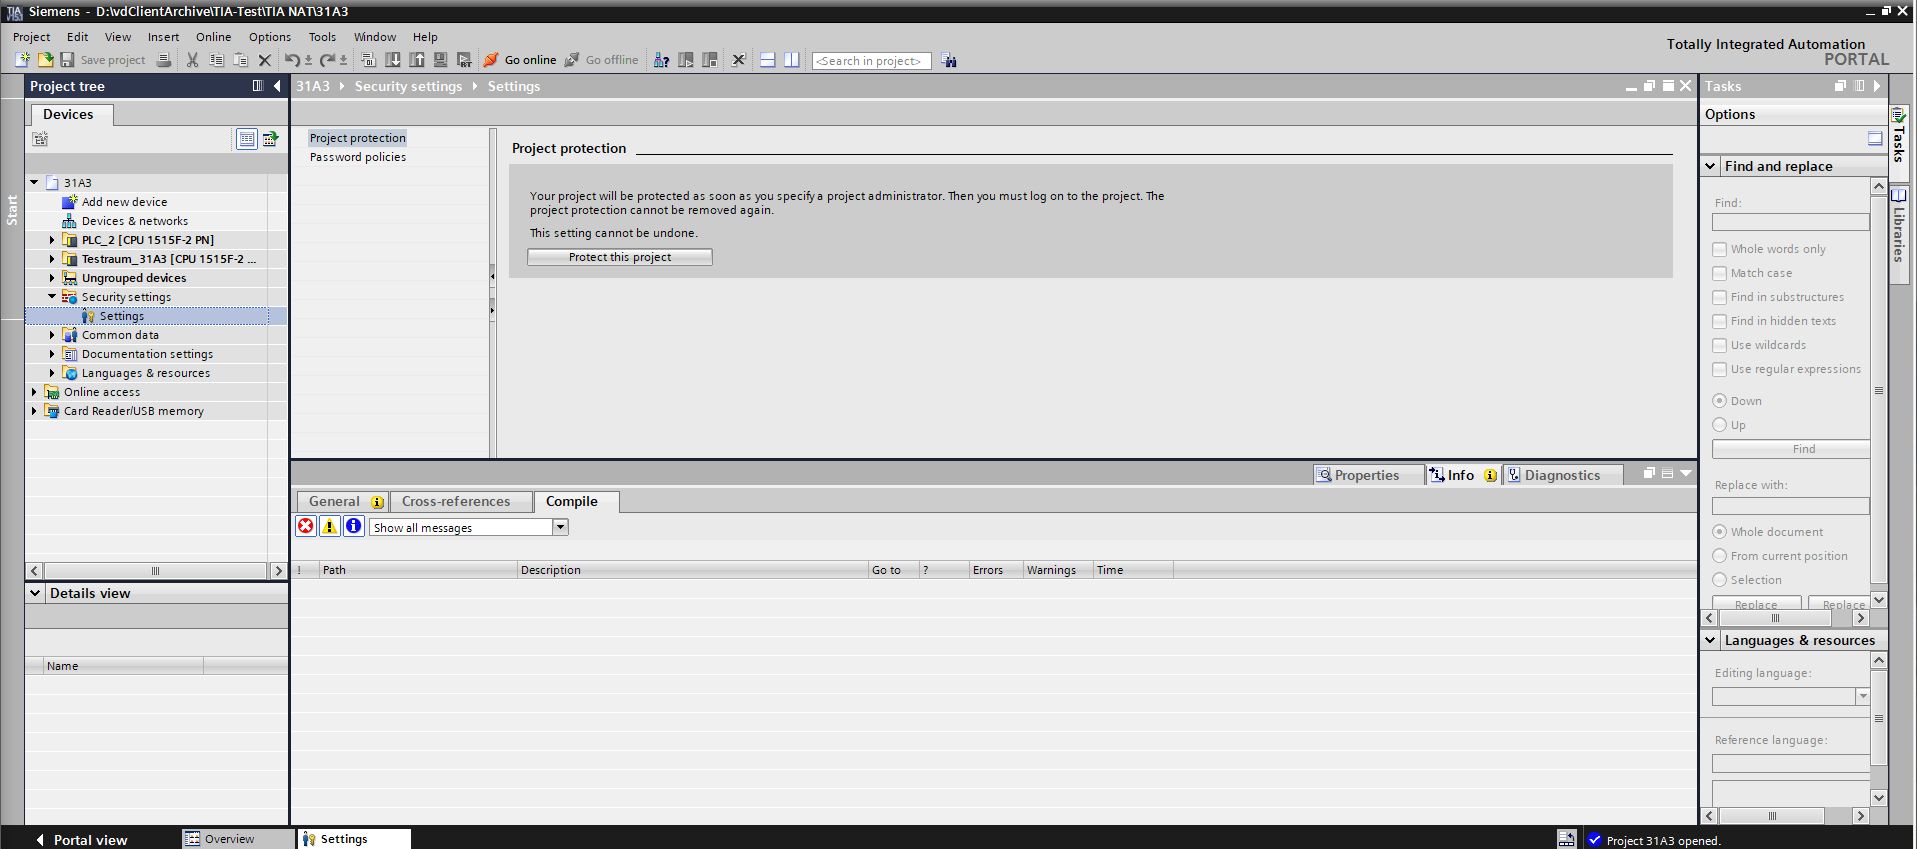
- To provide extra protection, TIA Portal offers the possibility to protect an entire project with user name and password.
 1.Image: TIA Portal, set up project protection
- versiondog determines the interface automatically. To enter it manually, check the Enter interfaces manually checkbox.
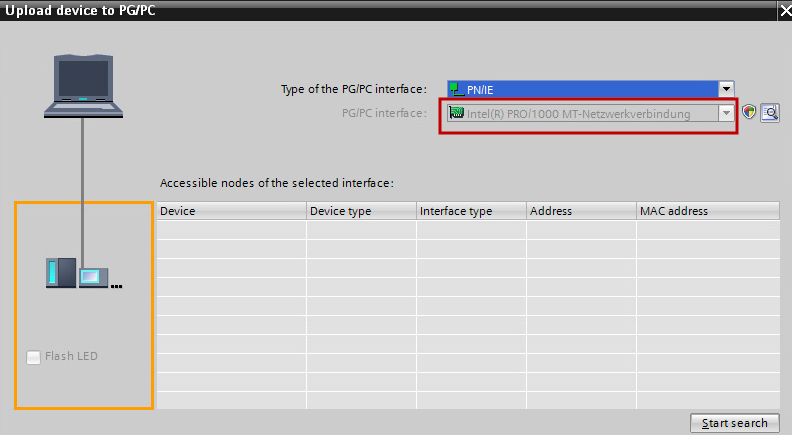
- Enter the PG/PC interface and the Slot in the corresponding fields.The PG/PC interface can be found in the TIA Portal editor, in the location shown below:
- Image: TIA portal, display PG/PC interface
- In the Advanced section, enter the login information required for the password protected project.
Note
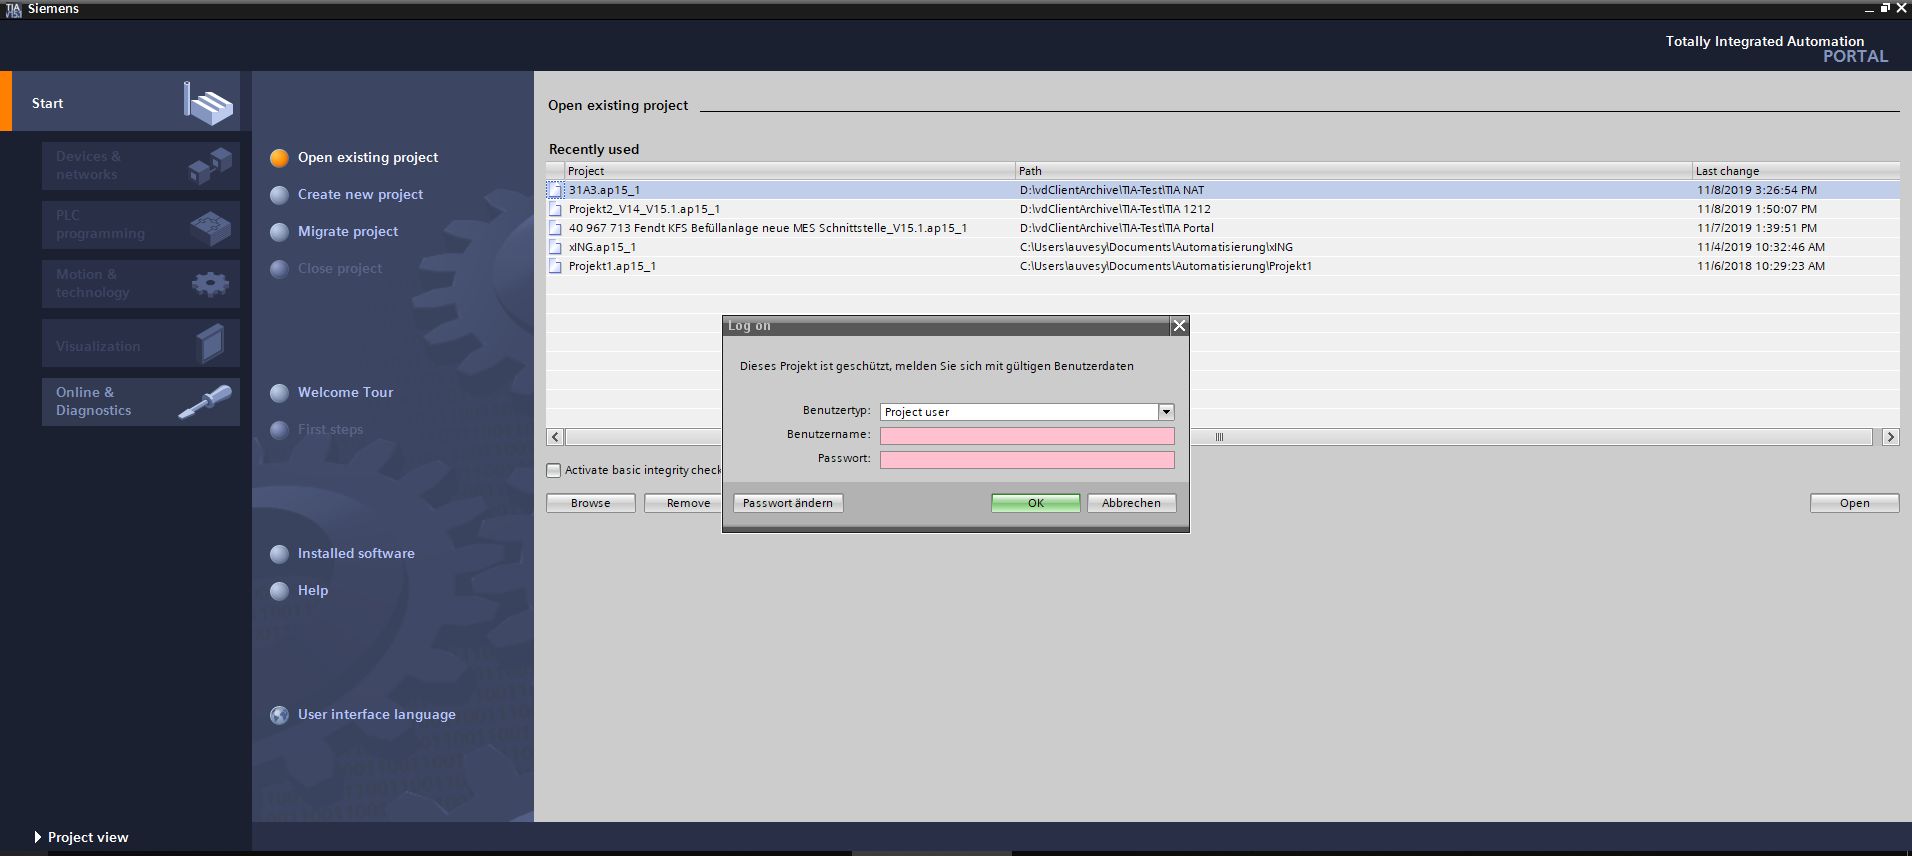
- You can recognize a password protected project by the fact that, when you open the project, the login data is queried
as follows: 1.  1.Image: TIA Portal, project protection, user data specification 1. If the IP address of the device differs from that of the project (for example, when using a NAT router) clear the Use device IP address from project checkbox and enter the IP address in the Device IP address section.You can use the Check button to check whether the IP address you entered can be reached. 1. Enter the password for the device in the CPU Password text box, if it is a controller with security functions (F-CPU). 1.
  1.Image: TIA Portal, F-CPU, Enter password 1. When you check the Execute station upload only if the selected fingerprints have been changed checkbox, a list of fingerprints will be displayed that can be individually selected for comparison.versiondog compares the status of the selected fingerprints with the last saved backup. If the fingerprints are the same, no Station upload is performed and the last backup is taken as the current one. The last backup will be taken as the upload result. The current values are not saved in this case. 1. 1.
 1.Image: Job configuration, section TIA Portal settings, upload variant station upload, fingerprints
Note
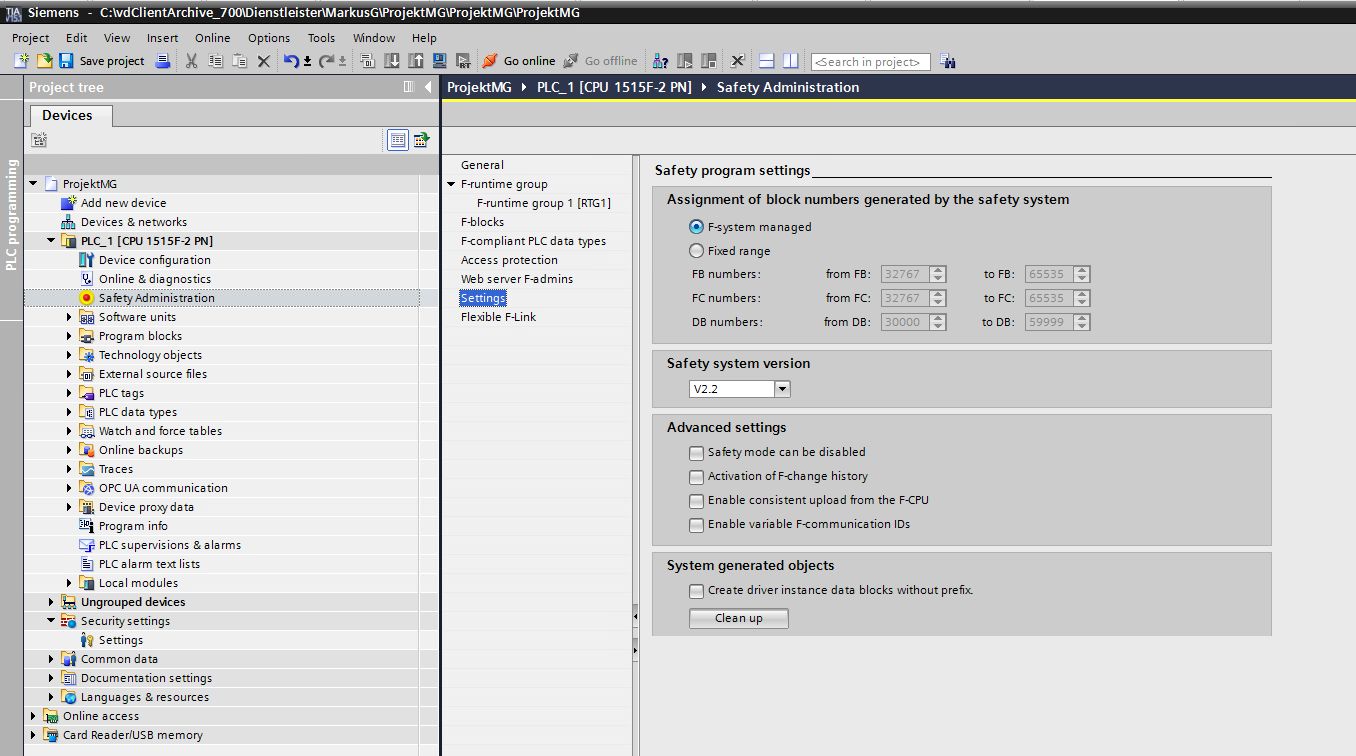
Activate the Enable consistent load from the F-CPU function.

Image: TIA Portal: Consistent loading from the F-CPU
If an error occurs that is not listed in the Event log, you have the option of activating Debug mode for the Station upload. If the debug mode is activated, the TIA Portal with graphical user interface is started. In case of an error, the program waits 2 minutes until TIA Portal is closed.
Note
When debug mode is enabled, the executing service must be run as an application.
The debug mode is activated in theAgentStation.inifile, in the following directories:
- For the server:
D:vdServerArchiveVD$AConfigurationUpload - For the agent:
D:vdAgentArchiveVD$AConfigurationUpload
If theUploaddirectory orAgentStation.inifile is not yet available, it will have to be added.
In theAgentStation.inifile, enter the following:
For more information on INI files, see the INI files section, located in the AdminClient tutorial.
Including and excluding current values from the comparison
From TIA Portal V15.1 onwards, you have the possibility to include and exclude current values from the comparison.
- In Job configuration, click on Comparison configuration.
- In DB compare, enable Compare content in order to activate the Current value comparison.
- If necessary, select Exclude initial/current values of the following variables and Include initial/current values of the following variables, and enter the corresponding variables.
 1.Image: Comparison configuration
- The following compare options are available to you:
- Consider “SetPoint” attributes: checked: ONLY values with this attribute are compared (unless there are any in Exclude/Include).
- Consider “SetPoint” attributes: cleared and Exclude checked (without entry) > ALL values are compared.
- Consider “SetPoint” attributes: cleared and Include checked (without entry) > NO values are compared.

