
Importing CSV files
A separate dialog is available in the UserClient for importing the CSV file.
- In the Home tab, click on Easy Asset Integrator.
-
The Easy Asset Integrator dialog will then open.
-
-
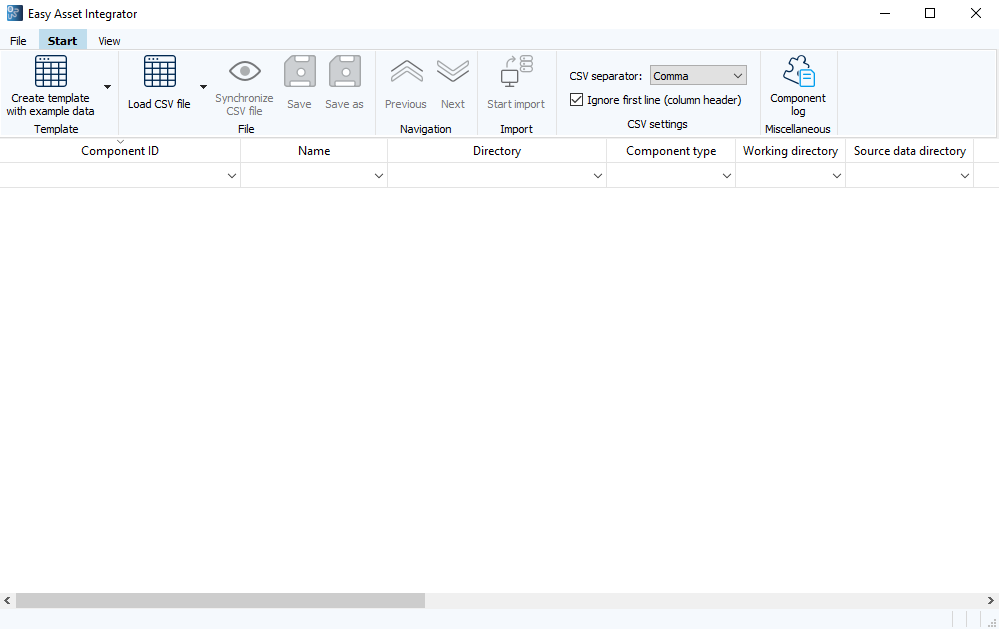
In the first step, implement the CSV settings: 1. In the CSV Separator dropdown menu, select the character that will be used as a separator between the individual columns in the CSV file.Default: the default CSV separator set in versiondog in the Global settings (Server tab). System symbol: the list separator set by default in your Windows system. 1. Check or clear the Ignore first line (column header) checkbox depending on whether the column names are listed in the first line of your CSV file or not. !!! note If the checkbox has been checked, the first line is always ignored, regardless of whether the CSV file actually contains a line with column names.
-
Import the CSV file via the option Load CSV file.The arrow next to the button Load CSV file offers you the option to choose from the last imported CSV files.
-

- The lines of the CSV file are listed in the dialog.
- When creating a new component in the column Component ID, the

- symbol will be displayed if a component ID has not been entered already, and the combination of name and component directory does not yet exist in the system. In this instance, the component will be newly created and the component ID automatically assigned.
- Errors that occurred when the data was being validated are marked with the symbol

- in the column, in which they occurred. You will also find an explanation of the respective error in a tooltip.
- The number of errors is shown in the Status bar. The status bar shows the total number of failed jobs (for example, 7 errors (5 filtered)). The first number indicates the total number of jobs that ended in an error (in other words, that failed), and the second number indicates the total number of filtered jobs that ended in an error.
-
You can check the errors directly in the columns of the dialog or in the CSV file. – If you make changes directly in the dialog and save them, the currently loaded CSV file will be overwritten. !!! note When saving, the CSV file is completely overwritten and coded in Unicode, irrespective of the code of the original file. – If you activate the option Synchronize CSV file and make changes in the currently loaded CSV file, these are adopted directly in the dialog when you save. If the Synchronize CSV file button is disabled, you will need to reload the file.
-
As soon as there are no more errors in the columns of the dialog, the Start import button will be activated.
-

Note
- You cannot check-in individual lines.
- When you click the Start import button, the listed components are either created in the Project tree or they are modified accordingly and checked in on the server.

- Lines, in which no problems occurred during the import, are marked with

-
.
-

- A message will appear, informing you that the Check-In with actual values was carried out and that the CSV file was updated and saved.
- Press OK and the Easy Asset Integrator dialog will close. If individual lines cannot be imported due to errors occurring during import, the dialog will remain open and the lines with errors will be listed. The
 icon will appear next to each line in which an error occurred. The table can be saved.
Note
The lines that have already been imported are marked in the CSV file with the entry Imported at the end of the line.
If you want to use the file as a template for further imports, you will need to remove the marking beforehand. During the next import, if you only make updates to the lines and remove the Imported entry, the lines in the Easy Asset Integrator dialog, will be marked with the  symbol.
In the Component log of theUserClient, components that were imported using Easy Asset Integrator, are marked in the column Message. You can also open the Component log directly from the Easy Asset Integrator and see whether the components were successfully imported.