
Components
Creating new components
- In the Project tree, select the directory where the new component should be created or create a new directory.
- Carry out one of the following functions:
- Press F8.
- Open the Project tree dropdown menu and then select the entry New component.
- Right-click on the directory selected and then select in the context menu the New component entry.
-
The Create component dialog will then open.
-
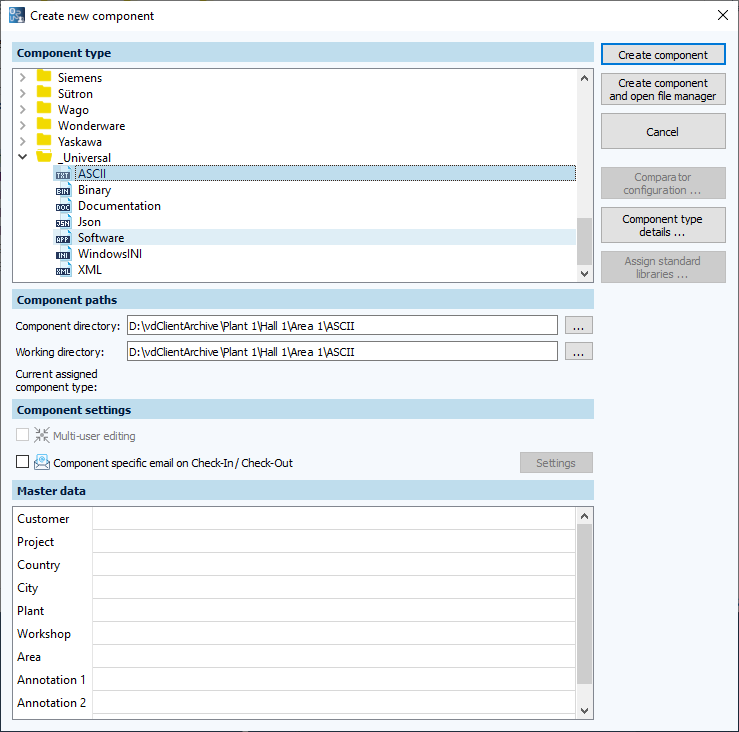
- In the section Component type, select the component type.
- In the fields, Component directory and Working directory, the name of the selected component type will be entered automatically as the name of the component. You can adjust this at any time. Edit the paths to rename the component if you wish to do so.
- Click on Create component.
The component will now be stored locally on your computer.
Deleting components
You can only delete a directory in the EasyClient locally; it is not deleted on the server.
- In the Project tree, select the component that you want to delete.
- Carry out one of the following functions:
- Press Delete.
- Open the Project tree dropdown menu and then select Delete.
- Right click on the selected component then click in the context menu on the Delete entry.
- In the Project tree, select the component and then in the Working area, click on the button
 .
.
-
The dialog Delete component will then open.
-
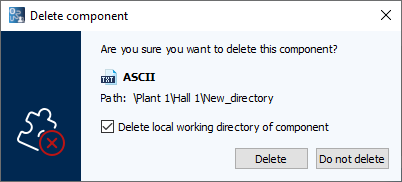
- If you want the component’s working directory to be deleted as well, check the corresponding checkbox.
- Confirm by clicking on Delete.
- The component will now be deleted locally.
Related Topics
Last update: September 15, 2023