
Checking out components
During Check-Out, the current version of a component is copied from the server archive onto the client archive (working directory) located on your computer.
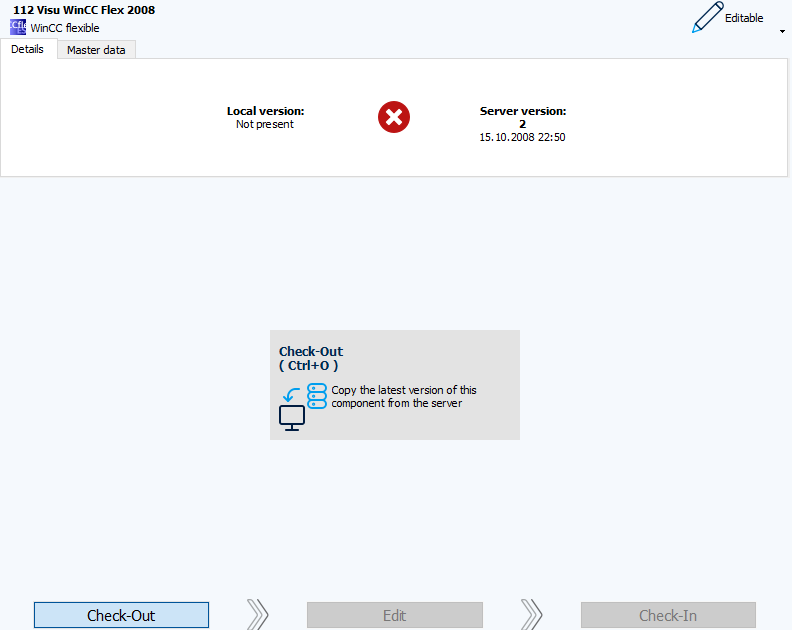
The Check-Out step in the navigation bar of the Working area is automatically selected when you select a component in the Project tree that does not yet exist locally, but does so only on the server. This is indicated in the Details section by the  symbol.
However, if the Details tab with the  symbol indicates that the local version does not correspond to the version on the server, you can also checkout the current version of a component that already exists locally.
Components can only be checked out if there is a connection to the server, in other words, the ![]() button above the Project tree is activated.
button above the Project tree is activated.
Proceed as follows
- Select the component in the Project tree.
- If the component is not yet available locally, the Check-Out view is displayed directly in the Working area. If the component is already available locally and you only want to check-out a current version, you must switch to the Check-Out view in the navigation bar.
- In the Check-Out view, click on the Check-Out button in the center or press the keyboard shortcut Ctrl+O.
- The Check-Out dialog will show the progress and is hidden when the checkout is complete.
- The component is displayed in the Project tree in black and the icon in color. The view in the Working Area automatically switches to Edit.