
Creating a new server
- In the octoplant server module, click on the
 button. This is located in the lower right-hand corner.
 - The Add octoplant server dialog will open.
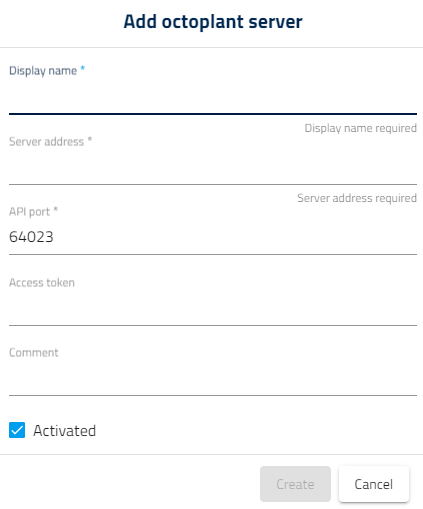 Image: Add octoplant server dialog
 - Enter the data for the server in the fields of the dialog.Display name, Server address and API Portare mandatory fields and must be filled in order to create a server in the octoplant hub.If you click in the API Port field, arrows will appear on the right side. These arrows allow you to increase or decrease the port number by 1 at a time.
- In the Access tokenfield, specify the access token that you created in AdminClient. Once you have clicked on theCreate button and created the server, the token will then be checked for validity. It must match the octoplant server from which it was generated.In the octoplant server module, in the Access token column, the token is not displayed in plain text. Rather, one of the following statuses is displayed: Valid, Invalid, Unknown, or Not present (if no token was specified).
- Check the Activated checkbox to use the octoplant server with the octoplant hub.
- Confirm your entries by clicking on Create.
- The newly created octoplant server will now be displayed in the octoplant server module.
- The Assign rights for
<octoplant server>dialog will now open. - Specify whether only administrators, or all users, should have access to the newly created server.If all users have access, the server is displayed in the Permissions dialog for
<username>. For each user, it is then possible to define whether they are allowed to use this server or not. - Confirm your choice by clicking on OK.
Note
You can check the connection to the newly created octoplant server directly.
- In the Details column of the respective server, click on the
 button.
 - A menu will appear.
- Click on Check connection.
The result of the connection check is displayed in a message.
Related Topics
Last update: September 15, 2023