
Changing component status
Using the dropdown menu in the upper right corner of the Working area you can change the status of the component selected in the Project tree.

The prerequisite is that the component is present on the server and not only your local computer.
- Editable The component can be edited by all users as desired.
- Under development This option is only used to inform other users that you are working on the component.
The  icon is displayed to the other users. However, they can still check out and edit the component.
- Lock for other users Other users can only checkout this component. They cannot edit it or check in their changes.
- This is indicated by the

- symbol.
If you have locked and edited the component, you can unlock it again so that other users can work on it.
- Unlock component This option is enabled for you only if you have locked the currently selected component yourself. You cannot unlock locked components of other users without administrator rights.
- Unlock and reset component This option is only available to users with administrator rights. If you do not have administrator rights, this option is disabled for you. This option allows the administrator to unlock components locked by other users as well and reset them to the state before locking.
Automatically change status at Check-Out
You can use the Client Settings dialog to specify that checked-out components are always either marked as Under development or lock for other users.
- In the ribbon, click on the button
 .
. - The dialog Client settings will then open.
-
Now enable the Check-In / Check-Out tab.
-
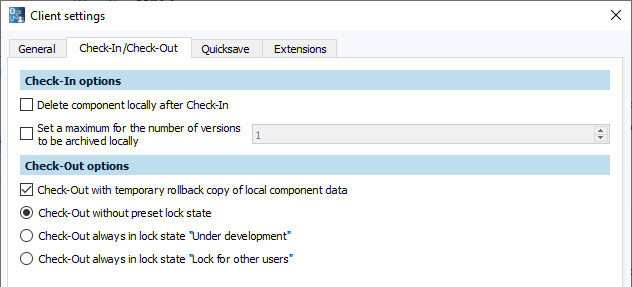
- Check one of the following options Check-Out always in lock state “Lock for other users” or Check-Out always in lock state “Under developmentâ€.
- Click on Apply and then close the dialog.
The next time a component is checked out, it will be automatically assigned the selected status.
Last update: September 15, 2023